We welcome and encourage community development of PypeIt! All code contributors
are expected to follow our PypeIt Code of Conduct and these development guidelines.
If you plan to develop the PypeIt code, you should install the code from a fork
of the main respository, as described below.
You may also need/want to create a fork of the PypeIt Development Suite! This process
proceeds similarly to the main code repository, except that you do not need to
pip install the dev-suite repository.
Except for a few maintainers, code development should be done in forks of the
code base. To fork the code, go to GitHub and click the “Fork” button at the upper
right. Do not change the name of the repository (PypeIt).
When you fork the code, you will be asked if you want to only copy the
release branch (default). If you uncheck this box, you will get all of
the current branches, which is almost certainly not something you want to do.
See below for one way to add the develop
branch to your repo.
Finally, you are strongly encouraged to add branch protection rules for both
the release and develop branches in your fork (these rules are not
inherited from the main repository).
Install the main PypeIt code, including its package dependencies, using pip
(even if you’re in a conda environment):
cd PypeItpip install -e ".[dev]"
This (specifically the -e option) creates an “editable” installation, which
means that any changes you make in the repository directory tree will take
immediate effect the next time the code is imported. Including the [dev] set
of optional dependencies ensures that all of the tools you need to test and
build PypeIt are installed. (Note that you may or may not need the quotes above
depending on your shell, and that you should avoid cutting and pasting these
commands into a terminal window.)
You do not need to execute a similar installation for the dev-suite.
The most obvious application of this is for your first checkout of the
develop branch into your fork. However, you can do this with any branch
(and with any remote). The steps are (1) update your repo, (2) checkout the
upstream branch, (3) push it to your fork (and change its remote tracking):
This does not update your local develop branch because we were not on our
local develop branch when we executed the rebase command. This only
updates the feature_branch with the changes made to its original base
branch, develop in this case.
Rebasing often requires forcing the push to your fork, using the --force
option, because it alters the commit history. If you try pushing without the
force argument, you will likely get a warning that your branch is out of date
and you need to pull the origin branch. Do not do this. Pulling in your
remote branch after rebasing will lead to a number of conflicts and, likely,
lost work.
If you’re working with another developer (who has a different fork) on a single
branch, you can add their fork as another remote and proceed similarly to how
you work with the main repo:
When you’re done, one of you can issue the PR from one of your forks into the
main repo. If you want to keep your remote list clean, you can remove the
remote connection after finishing the collaborative work:
release: This is the primary stable version of the code. Modulo any
very recent Hotfixes, this is closest to the most recently tagged and
released version. Pull requests to this branch are only done before tagging
a new release of the code or to perform critical bug hotfixes. The release
schedule is discussed during our bi-weekly development meetings.
develop: This is the main development version of the code. It should be
stable enough to use, but it may contain experimental, unsupported code that
is work in progress.
When editing the code, please create a new branch stemming from the develop
branch. You should also pull and merge in the most recent version of the
release branch to make sure your new branch includes any very recent
hotfixes. On the command line, you can do this as follows from your PypeIt
directory:
# Fetch upstream changes
gitfetchupstream
# Switch to your local release branch
gitcheckoutrelease
# Update it
gitmergeupstream/release
# Push the updated branch to your fork
gitpush
# Switch to your local develop branch
gitcheckoutdevelop
# Update it
gitmergeupstream/develop
# Push the updated branch to your fork
gitpush
# Create a new branch from your local develop branch
gitcheckout-bmy_new_feature
# Make sure develop is up-to-date with release
gitmergerelease
# Push the new branch to your fork
gitpush-uoriginmy_new_feature
Note
In terms of the merge with the release branch, beware that you may need to
start a new release version doc that reflects the jump in the version
number. This should only be necessary if your branch is the first one after
a new tag is released. See Logging changes.
The main thing to keep in mind when developing for PypeIt is that its
primary use is as an end-to-end reduction pipeline. This has a few
implications:
By default, the execution of run_pypeit should continue either until a
critical error is raised or the reduction is complete. No direct
interaction with the code should be required at any point. PypeIt does
have some interactive components, but these are executed only if specifically
requested by command-line arguments or via separate scripts.
Any input needed from the user for your feature should be provided by
User-level Parameters (preferred) or as a command-line argument.
When developing and debugging, you may need to interact with the code using
IPython.embed; however, these instances should be removed before
performing a pull request.
The success or failure of any given procedure must be assessed via
automatically generated quality-assessment figures (preferred) or via
scripts that interact with the primary output files.
See here for guidance on
adding a new spectrograph to the list of spectroscopic data that
PypeIt can reduce.
Feature development in PypeIt is unlikely to be fully independent of
other development activities. Your feature will likely depend on or
influence the outcome of other modules during the data-reduction
process. This leads to a few important guidelines:
Make sure that your branch is always up-to-date with the developandrelease branches. E.g.:
Consider the effects of simultaneous development efforts on your work
and vice versa. For example, if you’re working on a specific module
of the code that depends on the result/datamodel of the
wavelength-calibration module, you should communicate this and find
out if someone else is developing that module and how/if they’re
changing it. Depending on the scale of those changes, development
priorities may need to be worked out to minimize merge conflicts and
the need to immediately rework/refactor new code.
When you’re ready to, you can submit a PR at any time, but the core
development team will need to discuss the merge order to ensure a smooth
process.
Our primary means of communication for development is the PypeIt developers
Slack and a biweekly telecon. Contact X
Prochaska for Slack access and/or the relevant Zoom link.
It is important to log changes made to the code in a way that other developers
and eventually users can interpret. In the past we have done this using the
single CHANGES.rst file; however, we now have version specific change logs
in the doc/releases directory. In terms of development guidelines:
Changes made to the code should be logged in the relevant development log.
For example, all changes made after version 1.14.0 will be logged in a
doc/release/1.14.1dev.rst file. If the relevant file doesn’t exist when
you submit your PR, create it.
Changes are expected to fall under a small set of broad categories, like
improvements to performance for specific instruments, minor bug fixes, or
datamodel changes (see previous release docs for examples). When including
your change, add it below the relevant heading; if no relevant heading
exists, add a new one.
Hotfixes merged directly to the release branch should also be added to
the relevant development log. I.e., these changes are not part of the
released tag, even if they are in the “release” branch. Again, if the
relevant file doesn’t exist when you perform the hotfix, create it in a way
that it will get merged with the identical doc in the develop branch. See
Hotfixes.
When tagging, the development log will be renamed to the new tag version, and
a new file should be created for the next development phase. See
Tagging Protocol.
There may be bugs in the release version of the code that are not caught by
the tests, but significantly impact some users. Fixing these issues leads to a
patch release of the code, following this procedure:
Checkout the release version of the code.
Create a new branch from the release version (not the develop
version).
Implement the hotfix.
Create a release doc that lists the hotfix. For example, if the current
development doc is doc/release/1.14.1dev.rst: create the new file
doc/release/1.14.1.rst, edit it to include a description of the hotfix,
add it to the repo, and rename the existing development doc to indicate the
version increment (doc/release/1.14.2dev.rst). Also update the
doc/whatsnew.rst file to include the new release files.
Issue a PR and follow the Tagging Protocol. Following the example above, the
new tag would be 1.14.1.
PypeIt performs extensive testing using the PypeIt Development Suite; follow that link
for more details on executing the tests. Below, we describe how to add new
tests.
Add the new data to shared Google Drive under RAW_DATA. The tests are
organized into setup directories under a directory named for the
instrument.
Add a new PypeIt Reduction File specific to this data to the PypeIt
Development Suite repo under pypeit_files. The file name must be
lower case and named after the instrument and setup, for example:
keck_deimos_1200g_m_7750.pypeit.
If desired, add any files for pypeit_sensfunc, pypeit_flux_calib,
pypeit_coadd_1dspec, pypeit_coadd_2dspec to the
PypeIt Development Suite repo under sensfunc_files,
fluxing_files, coadd1d_files, coadd2d_files, respectively.
Edit the test_scripts/test_setups.py file in the PypeIt Development
Suite to include the new setup among the tests to perform. Follow the
instructions at the top of that file.
Run the full development test suite to completion. Once all tests pass,
the test_priority_file will be updated with the new test. This file
tells the test scripts what order to run the tests in for optimum CPU
utilization. Commit test_priority_list and any other files added to
the dev-suite repository and submit a pull request.
The PypeIt Development Suite also contains unit tests that require use of data in the
RAW_DATA directory and “vet” tests that are set of unit tests that require
output files from PypeIt scripts. The former typically test simple
functionality of the PypeIt code, whereas the latter (vet tests) check the
results of the PypeIt scripts against the expected performance/result.
Unit tests performed by GitHub continuous integration (CI) are located in the
$PYPEIT_DIR/pypeit/tests directory. To run them, make sure you have
pytest installed (this should be true if you followed the developer
installation procedure) and then run, from your PypeIt directory:
pytest
If some tests fail, you can run an individual test, e.g. test_wvcalib.py
with
pytest-spypeit/tests/test_wvcalib.py
Note that the “-s” option allows you to insert interactive debugging commands
into the test, here test_wvcalib.py, to help determine why the test is
failing.
Warning
Running these tests may generate files that should be ignored. Please do
not add these test files to the repository. We try to include clean-up as
part of the tests, but these are not always caught.
Note also that the use of pytest requires the test dependencies to be
installed. It is also possible, and often preferable, to run tests within their
own isolated environments using tox.
This provides the capability to easily run tests against different versions of
the various dependencies, including different python versions. The available
tox environments are defined in the tox.ini file and can be listed by
running tox-a. To run tests against the default dependencies using the
default python, do:
tox-etest
To specify a python version, do something like:
tox-epy312-test
To test against, for example, the main branch for astropy on GitHub, you
can do:
cd$PYPEIT_DIR
tox-epy312-test-astropydev
Similar dev dependencies are configured for numpy and ginga, as
well.
Unit tests included in the main PypeIt repo should not require large data
files. Some files are kept in the repo for this purpose (see the
pypeit/data/tests directory), but they should be minimized to keep the size
of the repository manageable (these test files are not included in the package
distribution). In general, unit tests that require input data files should
instead be added to the PypeIt Development Suite.
The PypeIt Development Suite is extensive and takes significant computing
resources and time. The PypeIt development team consistently executes
these tests using cloud computing. We recommend you ensure that your
PypeIt branch successfully runs on either a specific instrument of
interest or shane_kast_blue first, and then someone on the PypeIt
development team can execute the tests in the cloud. From the top-level
directory of the PypeIt Development Suite, you can run all tests for
shane_kast_blue as follows, from the PypeIt-development-suite
directory:
./pypeit_testall-ishane_kast_blue
Edit the relevant development log (e.g., doc/release/1.14.1dev.rst) to
include your key developments (see Logging changes) and update the
documentation. You can compile the docs using the update_docs script
in the PypeIt directory (see below), which is just a simple convenience
script for executing makeclean;makehtml in the doc directory.
./update_docs
Any warnings in the sphinx build of the docs must be fixed (i.e.,
“warnings” should be considered the same as “errors” in this context). If
you’re having difficulty getting the right sphinx/rst incantation, ping the
documentation channel in the PypeIt Developers Slack. Also note that, even if no warnings are
issued, it’s useful to check that the documentation formats as you expect.
After building the docs, you can open the doc/_build/html/index.html file
to view and navigate through the documentation in its entirety. Finally note
that building the docs requires access to the RAW_DATA directory in the
PypeIt Development Suite; the data are used to build some of the automatically
generated content for the documentation.
Make sure all your edits are committed and pushed to your fork:
gitadd-u
gitcommit-m'final prep for PR'
gitpush
Submit a Pull Request (PR) from your fork to the main
repository. Unless otherwise requested, all PRs should be submitted to the
develop branch.
Note
The addition of new commits causes setuptools_scm to automatically
increment the version based on the last tag that was pushed. This will be of
the form {next_version}.dev{distance}+{scmletter}{revisionhash}. See
the setuptools_scm documentation
for more details.
Once you’ve submitted a pull request, two developers will review your PR and
provide comments on the code. The minimum requirements for acceptance of a PR
are as follows:
If your PR introduces a new instrument (see New Spectrograph) that PypeIt
is to support for the long term, this instrument must be added to the
PypeIt Development Suite. That means raw data should be added to the Google Drive
and relevant tests should be added to the
PypeIt-development-suite/pypeit_test script (via a PR to the
PypeIt Development Suite repo) such that the new instrument is included in the list
of instruments tested by the testing script (pypeit_test).
The CI tests run by GitHub (see the Checks tab of the PR) on the remote
repository must pass.
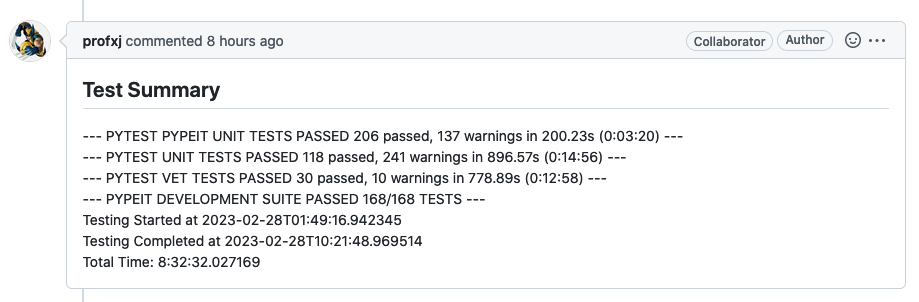
You (or someone running the tests on your behalf) must post a successful
report resulting from your execution of the PypeIt Development Suite, which should
look something like this:
The docstrings for any changes to existing methods that were altered
must have been modified so that they are up-to-date and accurate.
The documentation must be successfully recompiled, either using the
update_docs scripts or but running makeclean;makehtml in the
doc/ directory.
Spurious commented code used for debugging or testing is fine, but
please let us know if you want it to be kept by adding a relevant
comment, something like #TODO:Keepthisaroundfornow, at the
beginning of the commented block. Otherwise, we’re likely to remove
the commented code when we come across it.
“Unsupported code,” that is code that is experimental and still work
in progress, should be minimized as much as is reasonable. The
relevant code block should be clearly marked as experimental or WIP,
and it should not be executed by the main PypeIt executable,
run_pypeit.
The core development team will regularly tag “release” versions of the
repository. Tagging a release version of the code is triggered anytime the
development branch of the code or a hotfix is merged into the release
branch. Only a maintainer can tag the code.* The tagging process is as
follows:
At biweekly PypeIt telecons or over the PypeIt developers Slack, the
core development team will decide to merge the develop branch into
release.
A branch is created off of develop (typically called staged) and then
a PR is issued to merge
staged into release. This release...staged PR must meet the same
Pull Request Acceptance Requirements when merging new branches into
develop. Code review is expected to be limited (because all code changes
will have been reviewed before pulling into develop), but the result of
the dev-suite tests must be shown and approved. The reason for creating the
new branch, instead of a direct release...develop PR, is to allow for the
following updates to staged before merging (develop is a protected
branch and cannot be directly edited):
Fix any test failures. As necessary, an accompanying PypeIt Development Suite
PR may be issued that includes test fixes required code changes. If
no code changes are required, a PypeIt Development Suite PR should be issued
that merges its develop branch directly into its main branch.
Make any final updates to the development log, and rename the log to
the new tagged version (e.g., move 1.14.1dev.rst to either
1.14.1.rst or 1.15.0.rst). The doc/whatsnew.rst should
also be updated to reflect the file name change.
Update the list of supported versions in the SECURITY.md file.
Update the documentation by executing cddoc;makeclean;makehtml, add any updated files, and correct all errors/warnings.
Once the release branch and the PypeIt Development Suitemain branch are
updated, the dev-suite tests are re-run using these two branches. These
tests must pass before tagging. Once they pass, the code is tagged as
follows:
# Create a tag of the form X.Y.Z (using 1.14.0 here as an example).# The current autogenerated version is found in pypeit/version.py.
gitcheckoutrelease
gitpull
gittag1.14.0
# Push the new tag
gitpush--tags
Similarly, a matching tag is executed for the dev-suite code (these tags only
exist for versions 1.15 and later).
The tag of the pypeit code-base (not the dev-suite) is released for
pip installation.
gitcheckout1.14.0
# Make sure you have the most recent version of twine installed
pipinstalltwine--upgrade
pipinstallbuild--upgrade
# Construct the pip distribution
python-mbuild--sdist--wheel.
# Test the upload
twineupload--repositorypypeit-testdist/*
# Upload, this time it's for keeps
twineupload--repositorypypeitdist/*
For the uploading, you need a ~/.pypirc file that looks like this:
[distutils]index-servers=pypeitpypeit-test[pypeit]repository:https://upload.pypi.org/legacy/username=pypeitpassword=[ask for this][pypeit-test]repository:https://test.pypi.org/legacy/username=pypeitpassword=[ask for this]